


Mobile Workshop Dust Collection Cart
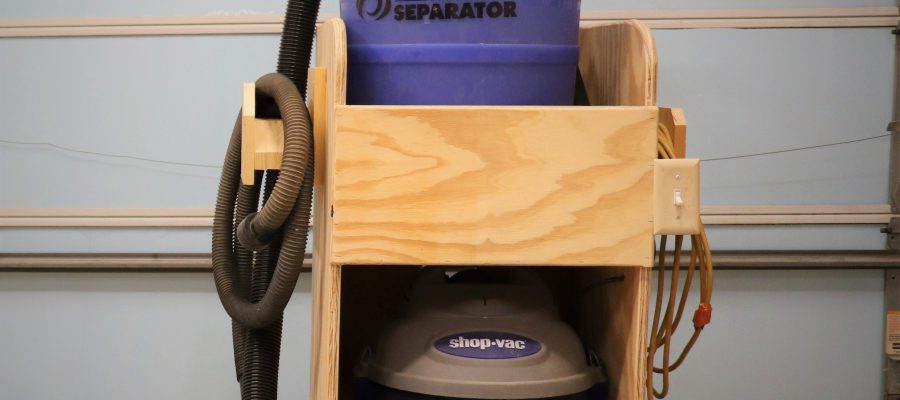
Hello there, thanks for stopping by our site! I built this mobile dust collection cart to hold my Shop Vac workshop vacuum and my dust separator. If you’re not familiar with dust collection or dust separation for a wood working shop, it’s definitely worth looking into and learning more about. Dust collection helps to keep your shop clean and sucks away dust and wood chips from your power tools. The dust separator pulls the dust and chips into a separate container to reduce this stuff from going straight to your shop vac bag and filter.
This is a relatively simple and easy build that can be made with just a few tools like a circular saw and drill. But having a table saw, brad nail gun, jig saw and router were useful and helped to speed up the process.
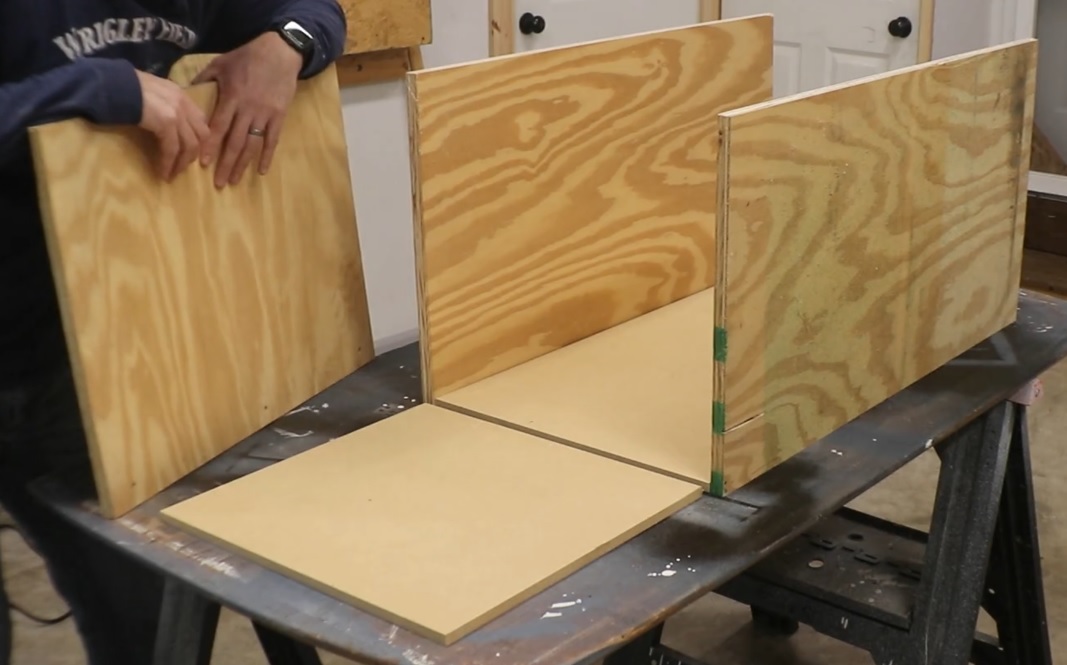
I used various thicknesses of scrap plywood and mdf that I had on hand in my shop, but this mobile dust collection cart can be made from one sheet of plywood with plenty of scrap left over to customize some holders for shop vac tools, hoses and any other accessories. The measurements below are assuming 3/4 inch material. Slight adjustments to the shelf measurements will be needed if thinner material is used.
***Dust Collection Cart – Cut List***
**Please note, the dimensions of my cart were designed specific to my shop vac size, so the body of your cart and the location of the middle shelf may need to be adjusted to fit the shop vac you own or plan to purchase.
The cart with wheels measures 38″ tall, 18 1/2″ deep and 18″ wide without any side accessories.
**Affiliate links to some of the of tools and products I used in this project are found in this post. Clicking on a link and purchasing something that you need helps to support How To Fix It Workshop at no added cost to you. Thank you for your support.
Building the box
I started by cutting the three main panels at 34″x18″, the 2 sides and the back. Next I cut 2 matching near square pieces for the bottom and the middle shelf at 18″ x 17 1/4″. Finally I cut out the 2 shelf fronts of 19 1/2″ x 10″ that hold the shop vac and dust separator in place.
I assembled all pieces with glue and brad nails but you can also use pocket screws or just screw the pieces together at the butt joints by drilling pilot holes and using wood screws.
The 2 side pieces were attached to the back panel first.

Then I added the bottom square shelf followed by the middle shelf.
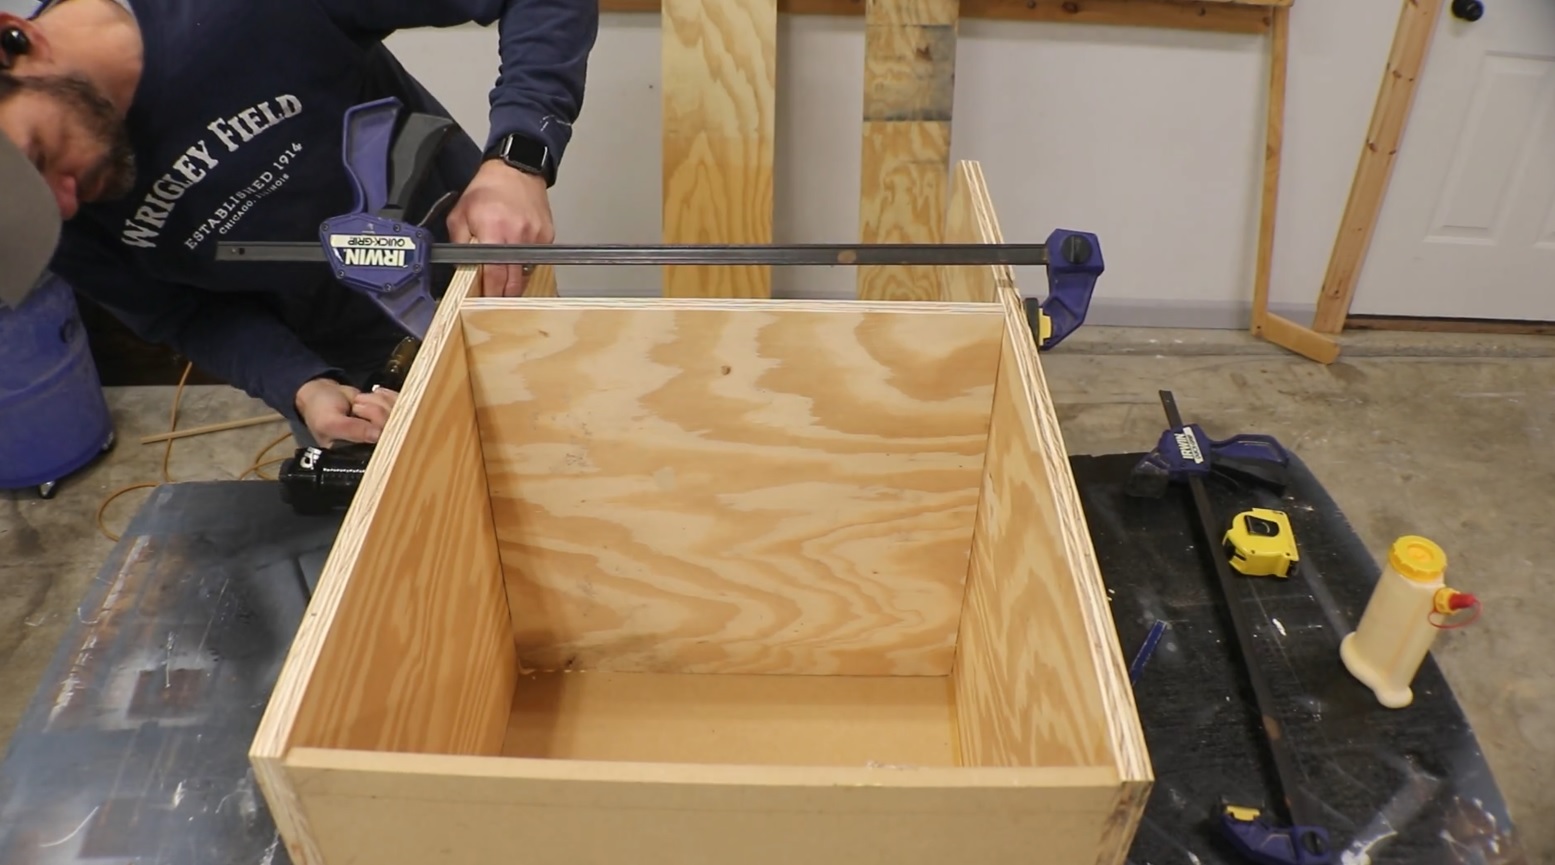
Finally, I cut the 2 font pieces that hold the shop vac and dust separator in place on the shelves and attached them to the cart. For my cart I glued and nailed the top shelf front but only screwed on the bottom shelf front. The bottom shelf and shop vac need to be accessible to remove the shop vac in order to change the bag and filter.

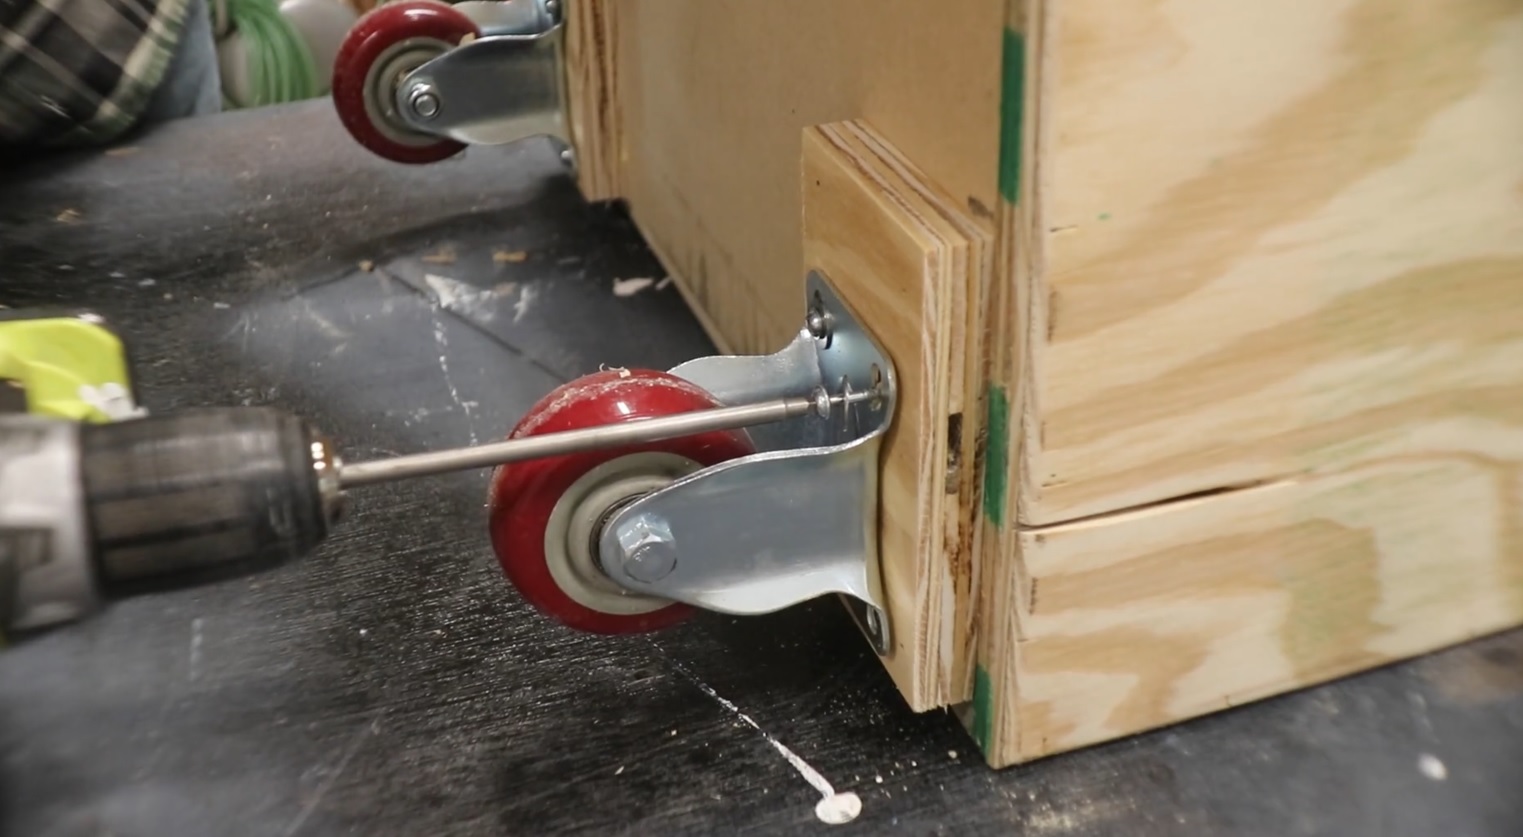
Wheels
For the wheels I used 4 inch casters.
I attached four 6″ x 4″ spacer blocks to the corners on the bottom of the cart in order to use 1 1/2″ screws to attach the casters:

Then added the 4 casters to the bottom:
Power Switch (optional)
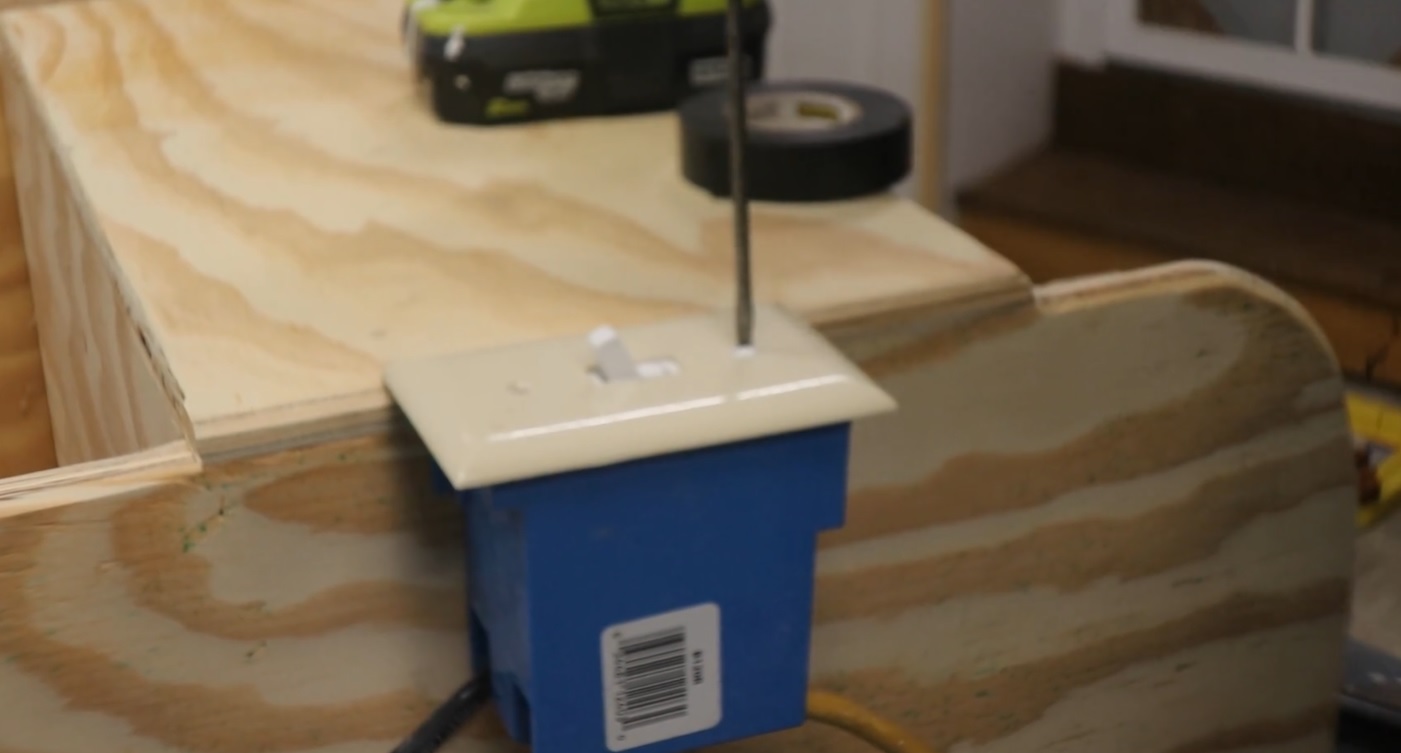
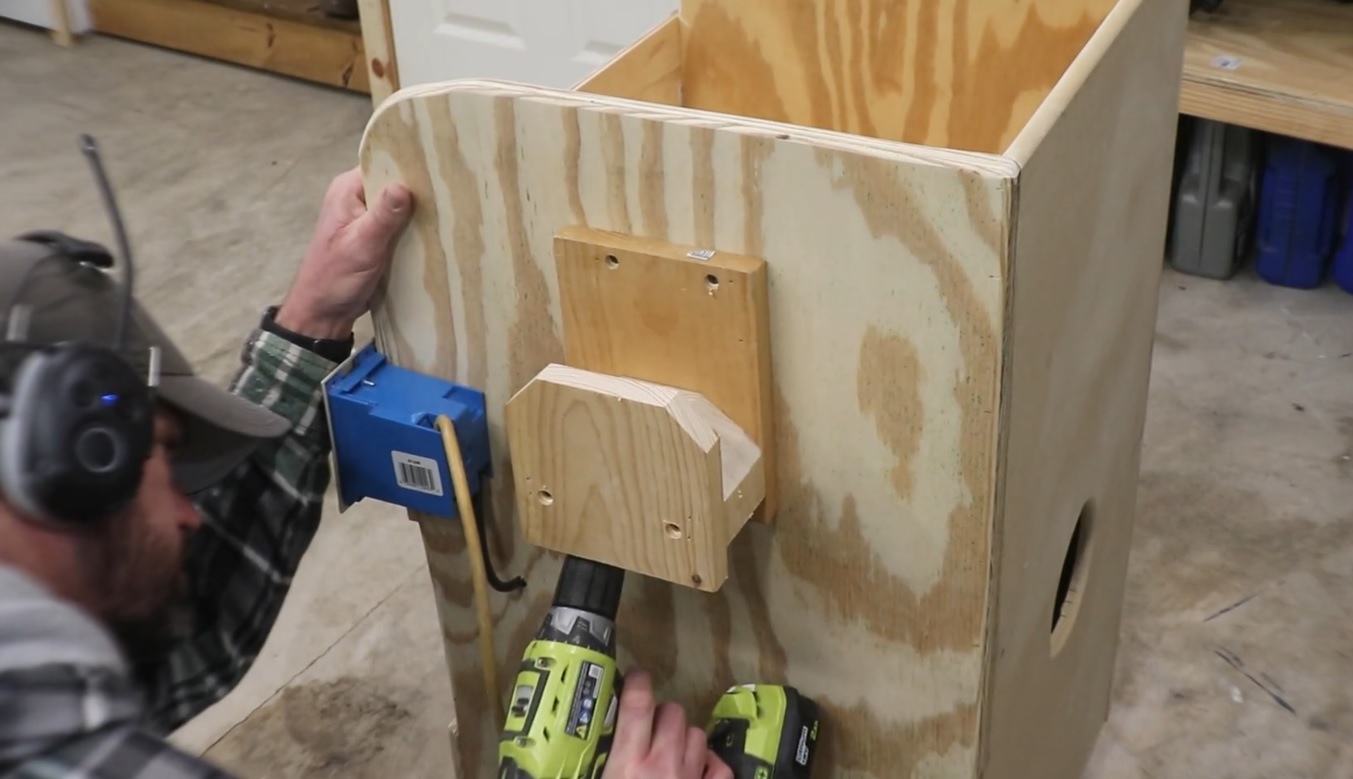
My shop vac has been around for many years and the on/off switch was wearing out. I decided to take apart the shop vac and remove the switch and wire the motor to a constant “on” position. I then cut off the “male” end or plug of the power cable and ran it through the side of the cart and into an electrical switch box that I attached to the side of the cart.
**If you are not comfortable with electrical wiring, please skip this step.
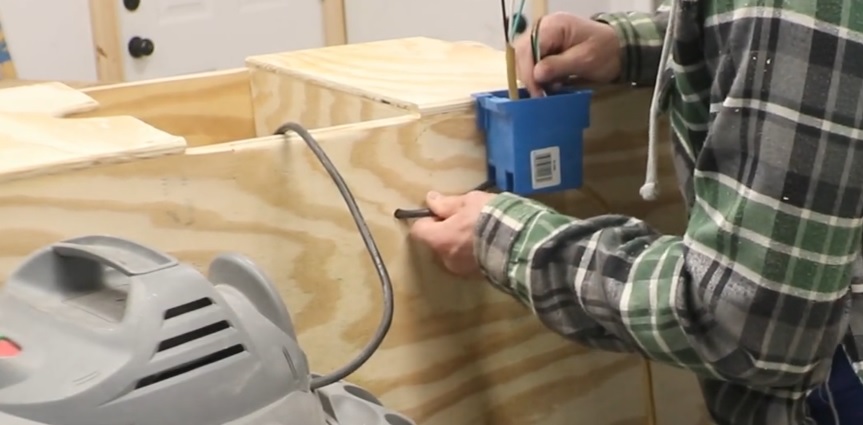
I also ran an extension cord into the box and cut off the “female” end. I then stripped the wires and tied everything together with a wall switch and switch plate for an easy on/off switch.
Hose and Cord holders for the sides
In order to have a spot to hang the extension cord and vacuum hose while not in use, I built a couple small holders that I attached to the sides of the cart. These are smaller versions of the Garden Hose Hanger.

Conclusion
This build only took a few hours and I wish I would have done it years ago. I highly recommend something like this to make life easier in the workshop. You will also reclaim 1 or 2 square feet of floor space. There are a few extra steps in the video that are not in this article, please watch the video for more details.
In addition, this is a fully customizable build that has an infinite amount of possibilities for size and accessories. There are several great videos on YouTube with a variety of different vacuums, dust separators and on-board accessories.
Please let me know if you have any questions or suggestions. Thanks for reading!